
The Calendar + plugin provides tools for creating, managing and displaying events in a calendar on your site.
Activate the Calendar + Plugin
- Click the “Plugins” menu item in the left-hand dashboard menu.
- Use the search box in the top right corner to search for “Calendar +”
- Click the “Activate” button for the Calendar + plugin.

Add a New Event
To add a new event, please follow the steps below. Prior to adding the event, you should add the event location, which can be done by following the directions in the “Add Event Locations” section below.- Select “Events > Add New Event” in the left dashboard menu.
- Populate the title and body fields just as you would a page or a post.
- In the “Event Details” section, select the type of event from the dropdown field (Regular Event selected by default), and then populate the date fields provided for that event type.
- Regular Event: An event that lasts no longer than one day. It may occur on multiple days, but each occurrence must be limited to a single day. You can set a single date below, and use the “Add New Date” button to add additional occurrences.

- Recurring Event: An event that repeats based on definable patterns (such as every 5 days, or every Monday). The initial date can be set using the “Date range” and “Time” fields, and then recurrence patterns can be setup in the “Recurrence” field.

- Multi-Day Event: An event that spans over multiple consecutive days. The dates can be set using the “Starts on” and “Ends on” fields.

- Regular Event: An event that lasts no longer than one day. It may occur on multiple days, but each occurrence must be limited to a single day. You can set a single date below, and use the “Add New Date” button to add additional occurrences.
- In the top of the right sidebar, select a location from the Event Location dropdown field (See “Add Event Locations” section below).

- Assign or add any relevant event categories or tags to the event using the tools provided in the right sidebar.


- Optionally set a featured image, just as you would for a post or page.
- Use the “Publish” section in the right sidebar, just as you would for a post or page, to configure immediate, scheduled or draft publishing of the event.
Add Event Locations
In order to assign locations to events, they must first be added to the system using the steps outlined below:- Select “Events > Locations” from the left dashboard menu.
- In the top left corner of the page, to the right of the “Locations” page title, click the “Add New Location” button.
- Populate the title and body fields just as you would a page or a post, to define the location name and description.
- In the “Select a Location” section, populate all address fields for the location.

- Optionally set a featured image, just as you would for a post or page.
- Use the “Publish” section in the right sidebar, just as you would for a post or page, to configure immediate, scheduled or draft publishing of the event.
Calendar + Events Settings
To configure or fine-tune settings for Calendar +, select “Events > Settings” in the left dashboard menu. The settings available on this page are each explained in detail below:Location and Time Settings
- Default Country: You may select a country to be used as the default when creating new events.
- Display Country in Locations Address: This checkbox controls whether the country will be displayed in the event location.
- Time Format Selector: You may select whether times are formatted in 24hr time or standard 12hr AM/PM time.
Setting Up an Events Page
This determines the page on which your events calendar will appear. Whatever page is selected here will be completely overridden by the display of the calendar. Before assigning this setting, it is recommended that you first create a new page title “Events” or “Calendar”, and leave the page body empty. This page can then be used as the Events page by selecting it in the Calendar + settings form and saving the form.Replacing a Sidebar with the Calendar + Sidebar
This setting enables you to replace a sidebar that’s displayed on your Events page with a customizable sidebar specifically for Calendar +. How this setting will work is a bit different with every theme. After selecting a sidebar to be replaced using this setting and saving the settings form, you should follow the steps below to set up a Calendar + specific sidebar:- Select “Appearance > Widgets” in the left dashboard menu.
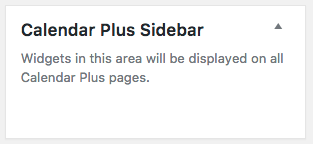
- Locate the “Calendar Plus Sidebar” widget area.
- You can now drag and drop any available widgets into the Calendar + sidebar (which will only be displayed on Calendar + Events pages).