 Demonstration goals:
- Demonstrate Kepler’s Third Law
Kepler’s work
Kepler was the eldest child of a poor family. He attended a pauper’s school and won a scholarship to study religion at the University at Tubingen. Though talented in mathematics, he first gained fame as an astrologer when, in 1595 CE, some of his weather predictions came to pass. (Most, however, did not.) He became an adherent of the Copernican theory of the solar system, and attempted to explain the motions of the planets using the five regular solids (cube, tetrahedron, dodecahedron, icosahedron and octahedron).
He continued to try various theories to explain the motions of the planets, including numerology and music. He published several books both describing his own work and supporting the work of others (most notably, Galileo). He sent copies of his works to Galileo and Tycho Brahe; in 1600 CE, Tycho asked Kepler to join him in Prague even though Tycho was a supporter of a modified form of the Ptolemaic theory. Unfortunately, Tycho died the year after Kepler arrived, and his family sued to recover both his notes and his instruments from Kepler. After a protracted legal battle, Kepler returned the instruments, but not the notes. Based on the data gathered by Tycho Brahe, Kepler was able to derive his Three Laws of Orbital Motion:
- The orbits of the planets are ellipses with the Sun at one focus
- A line from the planet to the sun sweeps out equal areas in equal intervals of time
- A planet’s orbital period squared is proportional to its average distance from the the Sun cubed
 |
For this experiment, you will need:
|
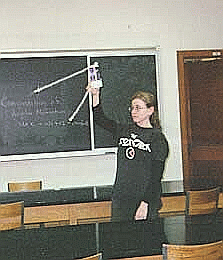
Before the demonstration: Mark the plastic cup in the center of the bottom. Drill a hole through the plastic cup in the place marked; make certain that the hole is at least twice as wide as the string. With sandpaper, smooth the edges of the hole. Thread the string through the hole. Thread the string through the wooden ball, so that the wooden ball is on the outside of the plastic cup, and tie the string so that the ball is well-secured. Thread the other end of the string through the metal ball, so that it is on the inside of the plastic cup, and tie the string so that the ball is well-secured.
1. Hold the cup in one hand, with the wooden ball hanging down; the metal ball should either be supported by your other hand or held in the palm of the hand holding the cup.
2. Slowly start swinging the wooden ball in a circle over your head. (You may want to practice this a few times before trying it in class.) As the wooden ball traces out a flat path, point out that the motion is circular, so the speed should be constant as the wooden ball travels.
3. Now release the metal ball. If you have the speed adjusted properly, the metal ball will slowly descend. This reduces the “orbit” of the wooden ball, since the two are connected. As a result, the wooden ball moves in closer to the center, and speeds up.
Advanced Keplerianism 4. With your free hand move the metal ball up and down, once per orbit. The students can verify that you are tracing our an ellipse with the wooden ball.
For Discussion:
What is the “string” in orbital motion? Can orbits only be ellipses? (HINT: What other conic sections are there?)